 Ferndale Siding
 Building New in Nooksack? The Windows Have to Be Right the First Time
If you're framing a new home or an addition out toward Nooksack, you already know this part of Whatcom County doesn't go easy on a building envelope. Between the salt air drifting in off the bay, long stretches of driving rain, and a moss season that seems to start earlier every year, a window that's installed even slightly wrong will tell on itself within a couple of winters — staining on the siding below the sill, a soft spot in the sheathing, or a draft that shows up the first time the wind swings out of the southwest. New-construction windows give you one real shot to get the flashing and integration right, because once the siding and trim go on, fixing a bad install means tearing back into finished work.
We're a Ferndale-based crew that works this area regularly, and new-construction window installs on Nooksack-area builds are a normal part of our week — not a specialty we're learning on your house.
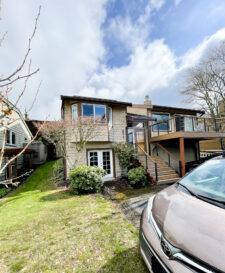
New-Construction vs. Replacement Windows — Why It's a Different Job
A lot of homeowners assume "installing windows" is one skill. It isn't, not really. Replacement (pocket or insert) windows go into an existing, already-flashed opening — the old frame stays, and the new unit is sized to fit inside it. New-construction windows are a different animal entirely: they have a nailing flange around the perimeter that gets integrated directly into the house wrap and flashing system before siding ever goes on. There's no forgiveness built in. The window, the weather-resistive barrier (WRB), the flashing tape, and the sill pan all have to work together as one continuous water-management system.
Get that sequence wrong — flashing tape in the wrong order, a missing sill pan, house wrap lapped backward — and water gets a path behind the cladding with no way out. On a new build, that mistake gets covered up by siding and trim and won't surface for a year or two, which is exactly why the install matters more than the window brand.
What Correct Installation Actually Involves
- A sloped or pre-formed sill pan under every rough opening, so any water that gets past the window drains back out instead of pooling on the sill
- Flashing tape applied in proper shingle-lap order — sill first, then jambs, then head — so water always sheds downward and outward, never into a seam
- House wrap integrated so the top flap laps over the head flashing, maintaining a continuous drainage plane above the window
- Nailing flange fastened per the manufacturer's schedule, not "close enough" — under-fastening lets a window rack or leak at the corners
- Shims set correctly in the rough opening so the frame isn't relying on fasteners alone to stay square and plumb
- Backer rod and exterior sealant at the trim line, sized and installed so it can flex with seasonal movement instead of cracking
- A visual and, where possible, water-test check before siding closes the opening up for good
What This Region's Weather Does to a Window Install
Salt Air and Metal Fatigue
Homes closer to the water in Whatcom County deal with airborne salt that accelerates corrosion on fasteners, hinges, and lesser-grade flashing metal. On new builds we spec corrosion-resistant fasteners and flashing components rather than whatever's cheapest at the yard, because a fastener that starts rusting inside a wall cavity is a problem nobody sees until it's expensive.
Driving Rain and Wind-Driven Water
Wind off the Strait and the bay doesn't just drop rain straight down — it pushes it sideways and up under trim and flanges that aren't sealed correctly. This is the single biggest reason we're strict about flashing sequence and sealant placement. A window that would perform fine in a dry climate with a sloppy install can still fail here specifically because of how the wind loads the water against the wall.
Moss, Shade, and Slow-Drying Walls
Long moss season means a lot of north- and west-facing walls around here stay damp longer between rain events, especially on tree-lined or partially shaded lots. That slower drying time is exactly why the drainage plane behind the siding needs to work — a wall system that can shed and dry water on its own tolerates the occasional missed maintenance year far better than one that's relying on perfect caulk to keep water out entirely.
Choosing Window Products for a Nooksack-Area Build
We're not tied to one manufacturer, but we are particular about what we'll put our name behind in this climate. The honest trade-offs:
| Frame Material | Strengths Here | Trade-Offs |
|---|---|---|
| Vinyl | Good value, low maintenance, solid thermal performance | Can expand/contract more with temperature swings; quality varies a lot by manufacturer |
| Fiberglass | Dimensionally stable, holds paint well, strong long-term durability in wet climates | Higher upfront cost than vinyl |
| Wood-clad | Interior warmth and appearance many builders want | Exterior cladding integrity depends entirely on install quality; more maintenance-sensitive over time |
| Aluminum | Strong, slim sightlines for larger openings | Poor thermal performance unless thermally broken; not common in residential new-construction here |
Whatever frame material you land on, we'll talk through U-factor and Solar Heat Gain Coefficient (SHGC) ratings that make sense for a Whatcom County climate — this area doesn't need the same glass package as a house in eastern Washington, and buying more solar control than you need just adds cost without a benefit.
How We Work on Nooksack-Area New Builds
Coordinating With Your Builder or GC
On new construction, windows have to land in the schedule at exactly the right moment — after the WRB is up, before siding starts. We coordinate directly with your general contractor or framing crew so there's no gap where the rough openings sit exposed to weather longer than they need to, and no rush that skips a flashing step to keep the schedule moving.
Site Walk and Rough Opening Check
Before a single window goes in, we check that rough openings are square, properly sized, and flashed to spec. Catching a framing issue at this stage costs a phone call. Catching it after siding is on costs a demo.
Installation and Documentation
We install per manufacturer specifications (which also protects your window warranty — more on that below), photograph the flashing sequence on each opening before it's covered by siding, and do a final check for level, plumb, square, and smooth operation on every unit.
Final Walkthrough
Once siding and trim are complete, we walk the exterior with you or your builder to confirm sealant lines, trim reveals, and hardware function before we call the job done.
Why a Local Crew Matters More Than It Sounds Like It Should
New-construction window installation isn't complicated in theory, but the details that matter here are regional. A crew that mostly works drier inland climates doesn't think about wind-driven rain the same way, and a crew unfamiliar with Whatcom County's inspection process can slow your build down waiting on clarifications. We're based in Ferndale and work Nooksack-area builds regularly enough that the flashing details that matter locally — sill pan slope, fastener corrosion resistance, sequencing around this area's rain patterns — are just how we build every opening, not a special request.
There's also a simple accountability piece: if a question comes up on an inspection, or if something needs a look two years down the road, you're calling a crew that's five, ten, fifteen minutes away and still doing this work in your neighborhood — not chasing down a company that did one job in the area and moved on.
Cost Factors on a New-Construction Window Package
Every build is different, but the line items that actually move the number are consistent:
| Factor | Why It Matters |
|---|---|
| Number and size of openings | More openings and larger units mean more material and labor hours |
| Frame material | Vinyl, fiberglass, and wood-clad carry different unit costs, as shown above |
| Glass package | Upgraded low-E coatings or triple-pane glass add cost but can be right-sized to this climate |
| Opening complexity | Bay windows, custom shapes, and oversized openings take more flashing detail and labor |
| Access and site conditions | Second-story or hard-to-scaffold openings add time |
| Coordination timing | Installing on schedule with the build avoids costly re-mobilization |
Warranty and Inspection Considerations
Most manufacturer warranties are conditioned on installation meeting their published specifications — not just "professionally installed" in a general sense. If flashing or fastening deviates from that spec, you can end up with a window that's technically defective-free but has a voided warranty because of how it went in. We install to manufacturer spec specifically to keep that warranty intact, and we document the flashing sequence so there's a record if a question ever comes up. On the building-department side, new-construction window installs are typically part of your weather-resistive barrier or building envelope inspection — we build to a standard that holds up under that inspection rather than hoping it passes.
A Few Things Worth Checking Before You Hire
- Ask specifically how they handle sill pan flashing — "we use flashing tape" isn't the same as a described, sequenced process
- Confirm they'll coordinate directly with your builder's schedule, not work around it
- Ask whether they document the flashing install with photos before siding closes it up
- Confirm the fasteners and flashing components are rated for coastal/salt-air exposure, not generic hardware
- Ask how they handle a rough opening that isn't square or properly sized when they arrive
If you're planning a new build or addition in the Nooksack area and want windows installed the way this climate actually requires, we'd be glad to take a look at your plans and walk the site. Reach out for a free, no-pressure estimate using the form below.